Answering my own question. Here’s a tutorial for anyone who needs the help.
You will need the URL Rewrite module; you probably already have it in order to make the Reverse Proxy work with your Xojo Web App. Grab it here: https://www.iis.net/downloads/microsoft/url-rewrite
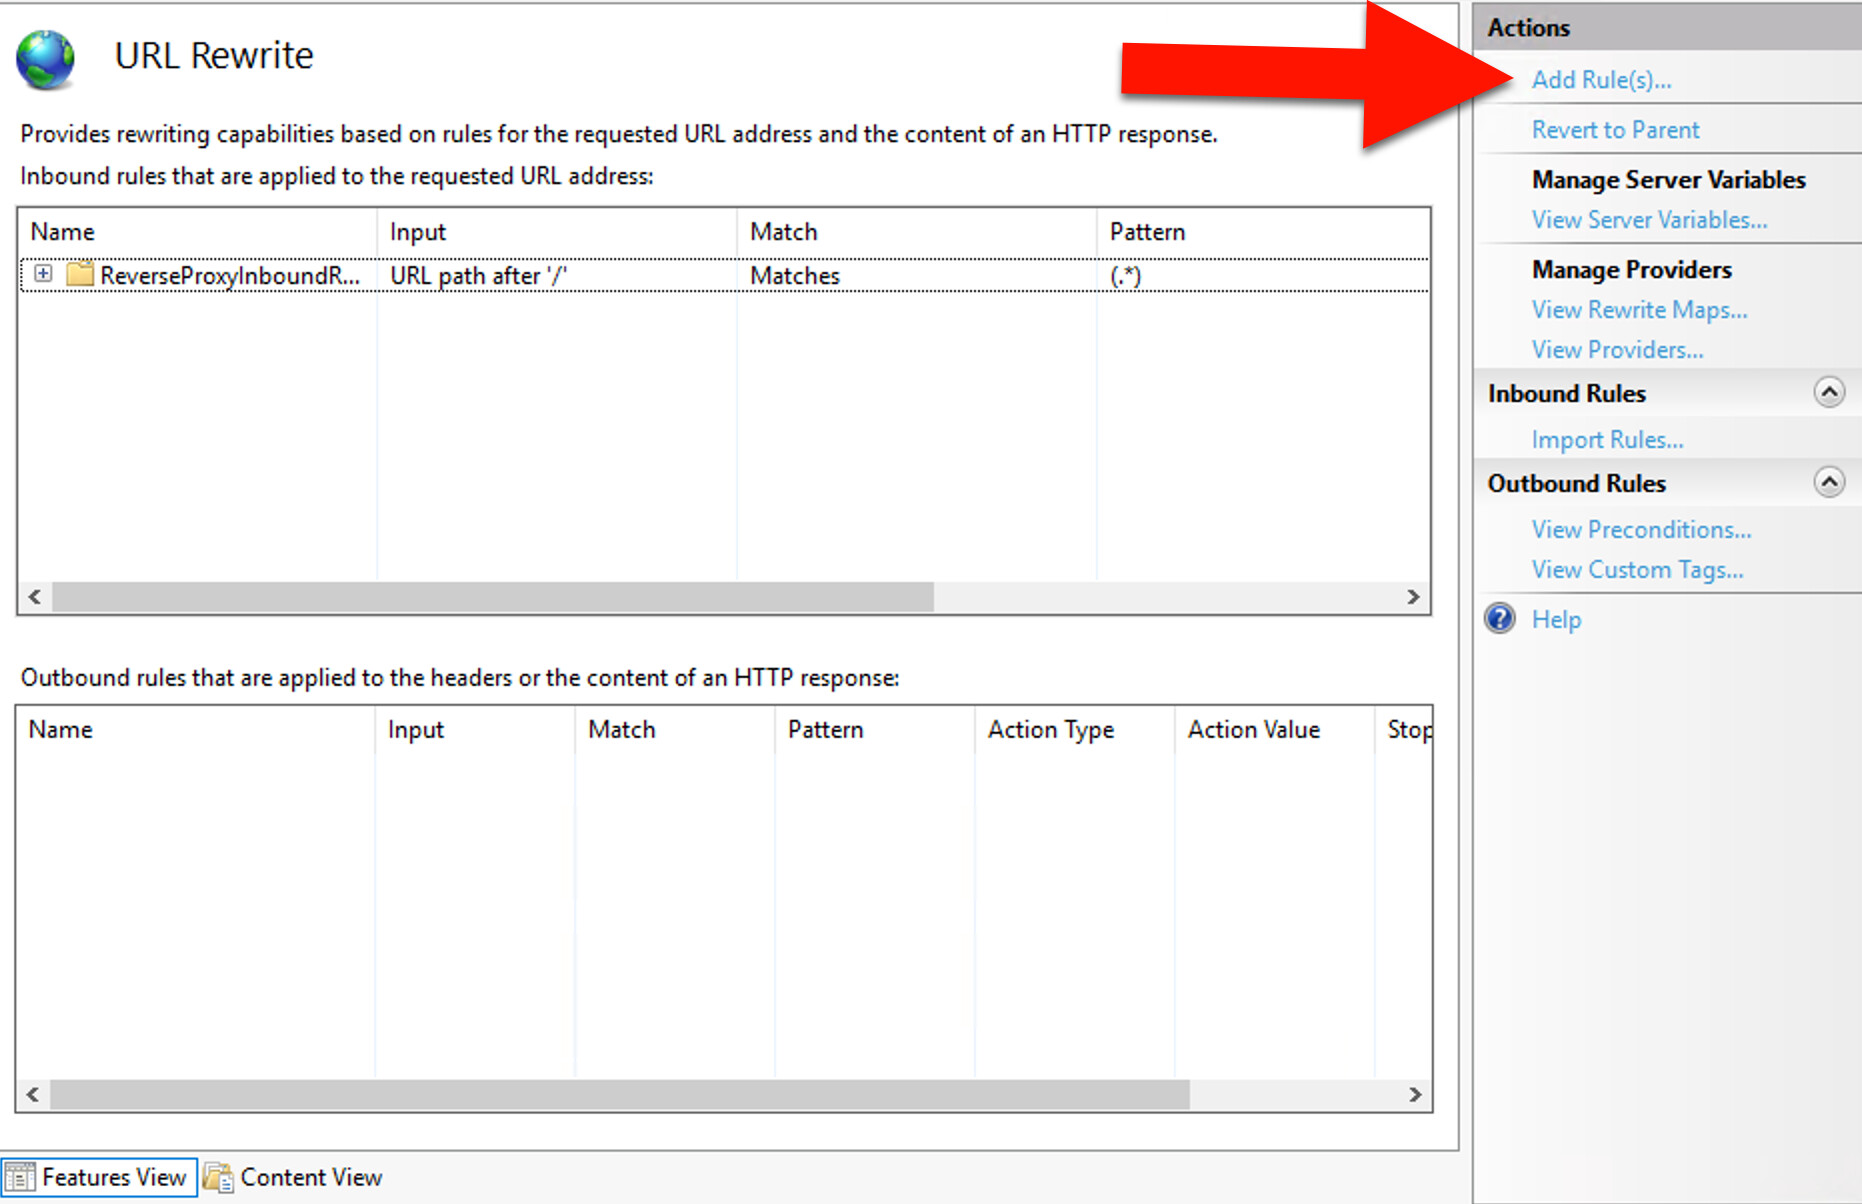
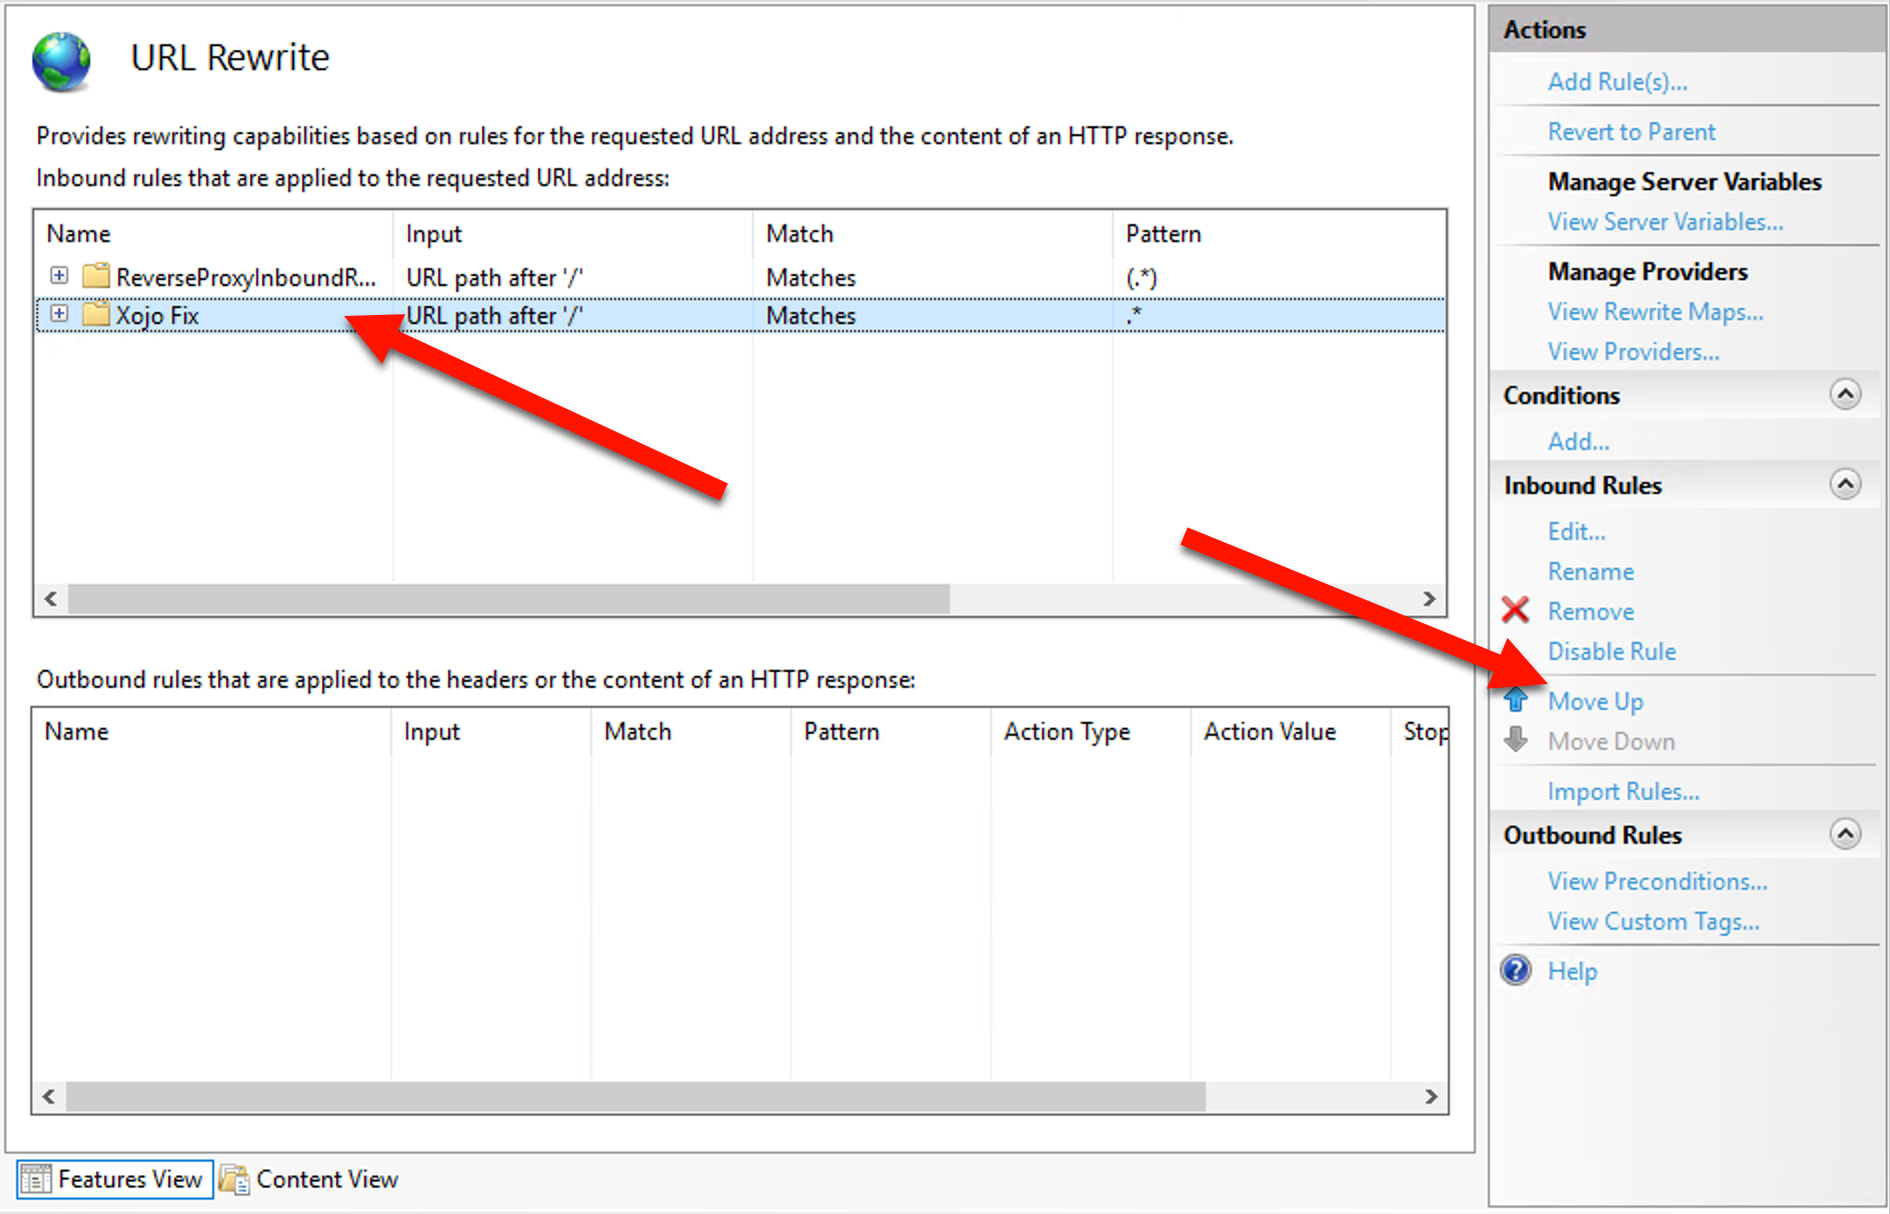
Open your website in IIS Manager, and open the URL Rewrite module. You can see here I already have the reverse proxy set up for my app. Click Add Rule(s)…
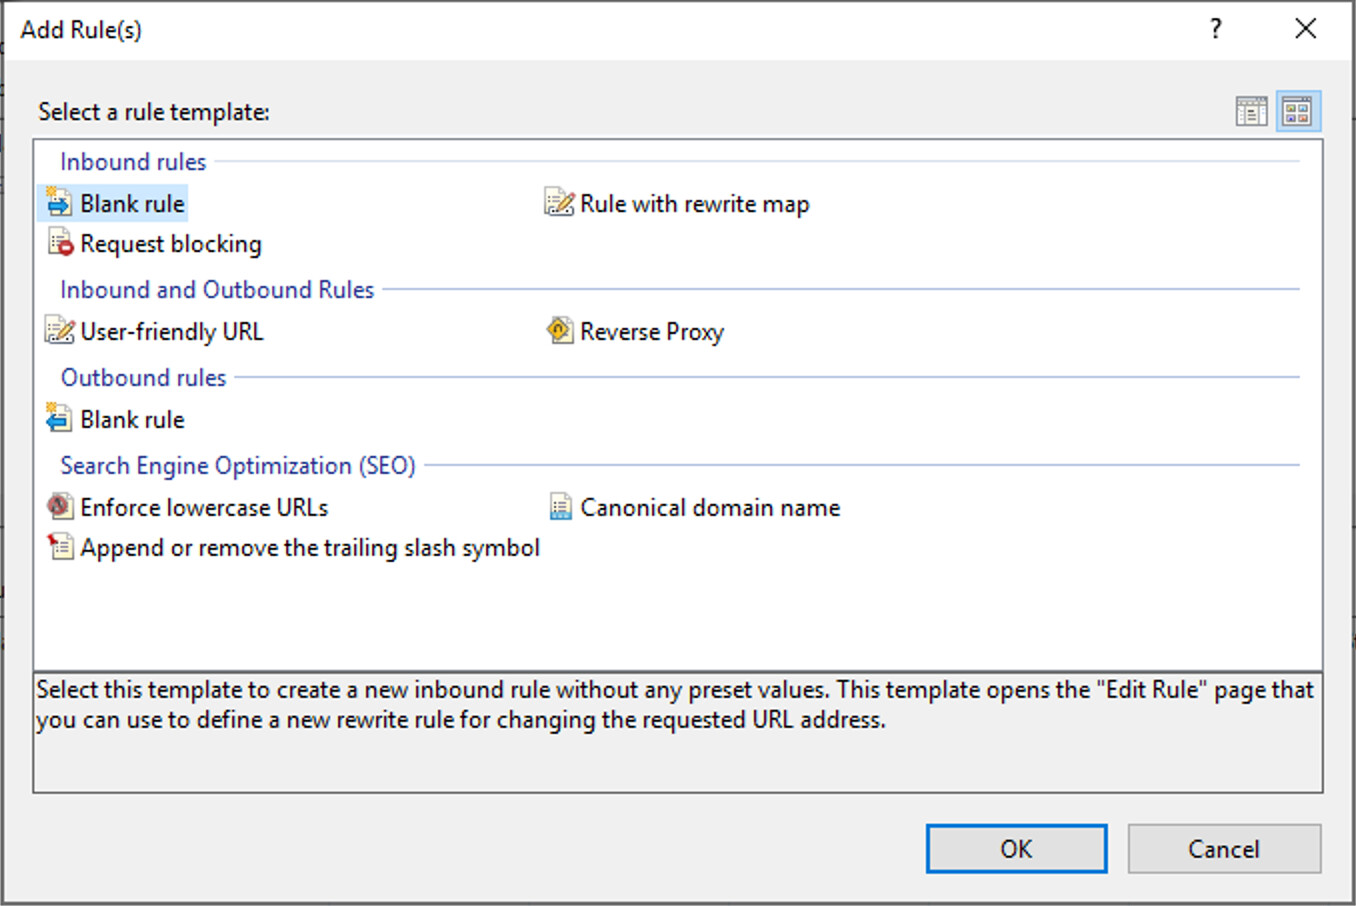
Select Blank rule and click OK.
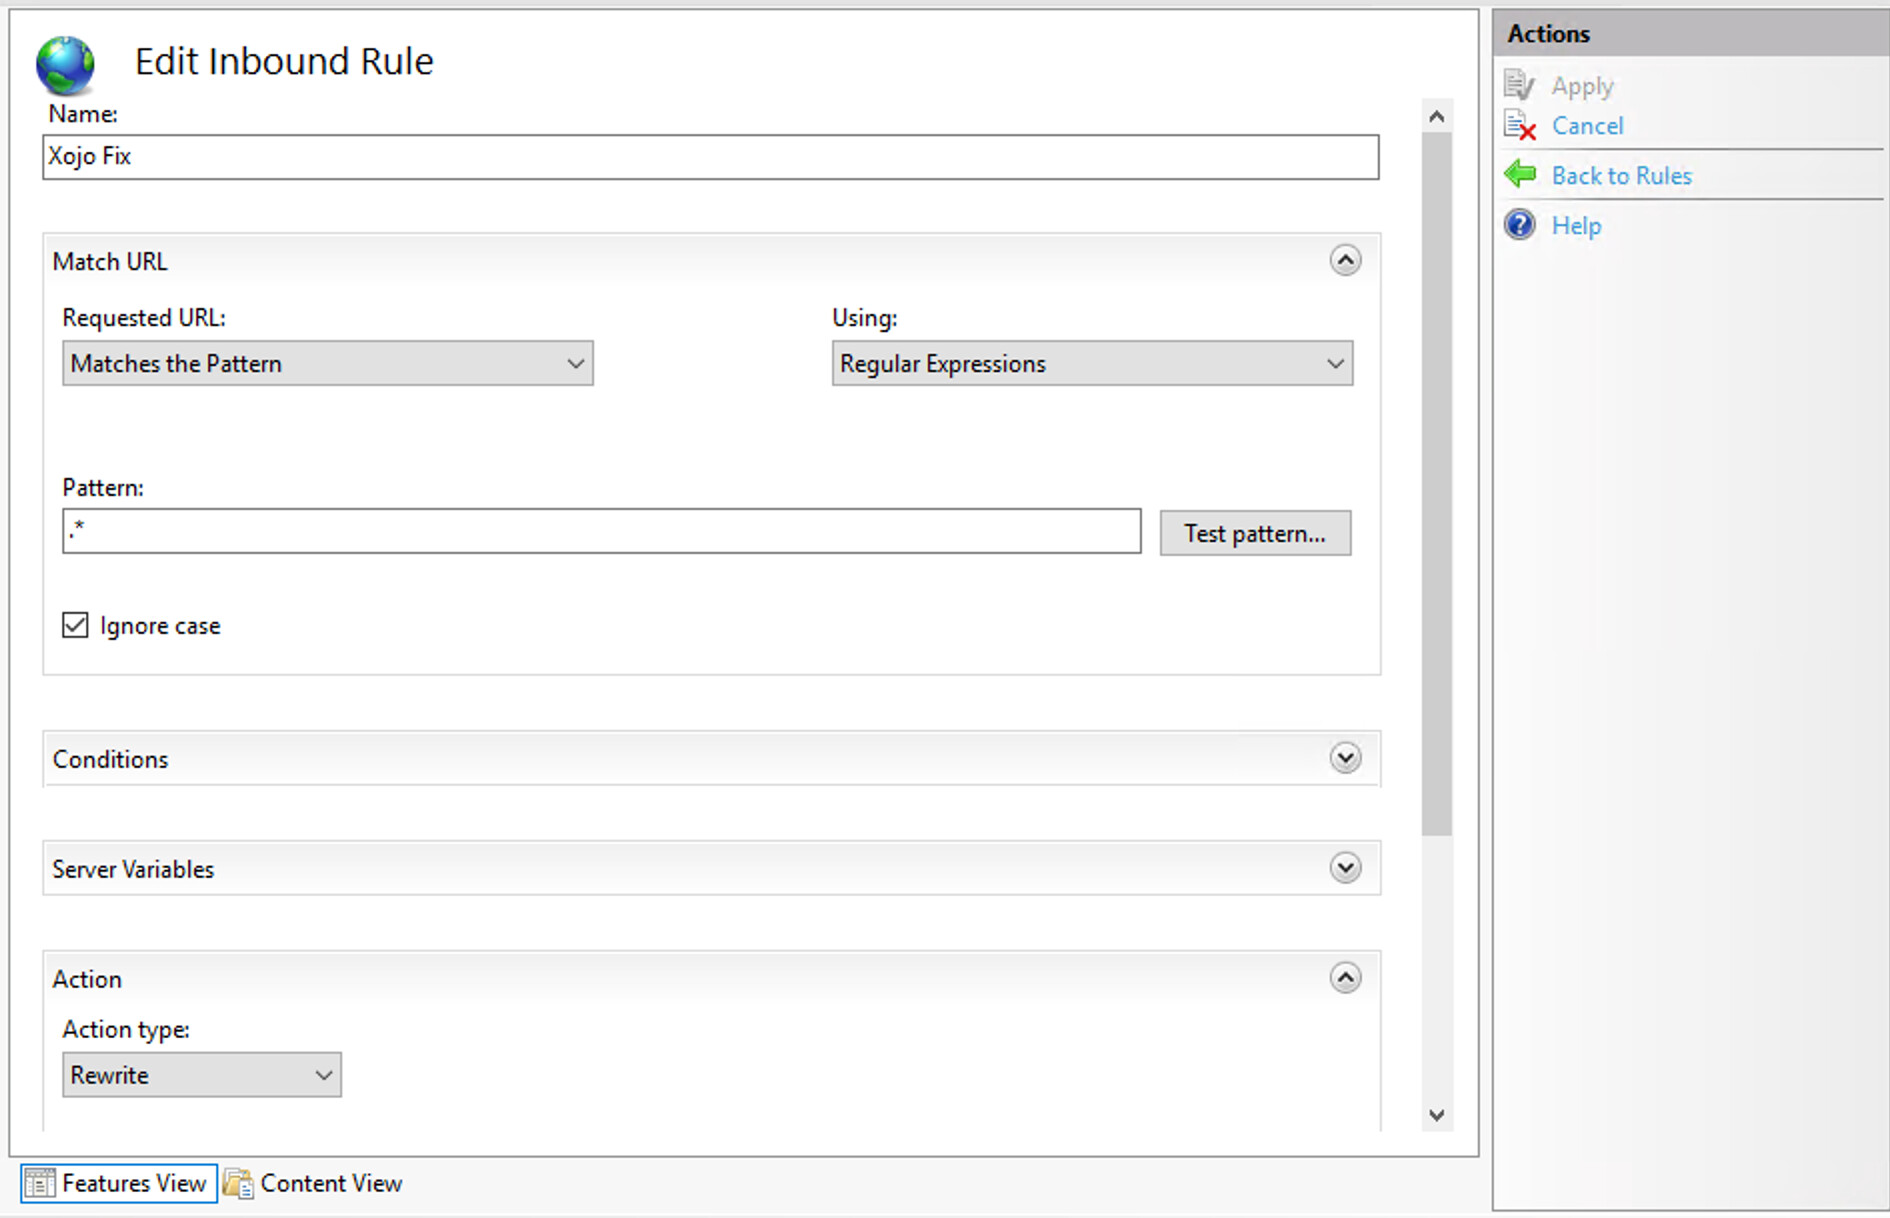
For Name, you can enter any name you like, here I’ve used “Xojo Fix”.
You want Requested URL to be “Matches the pattern” and the Pattern is .*
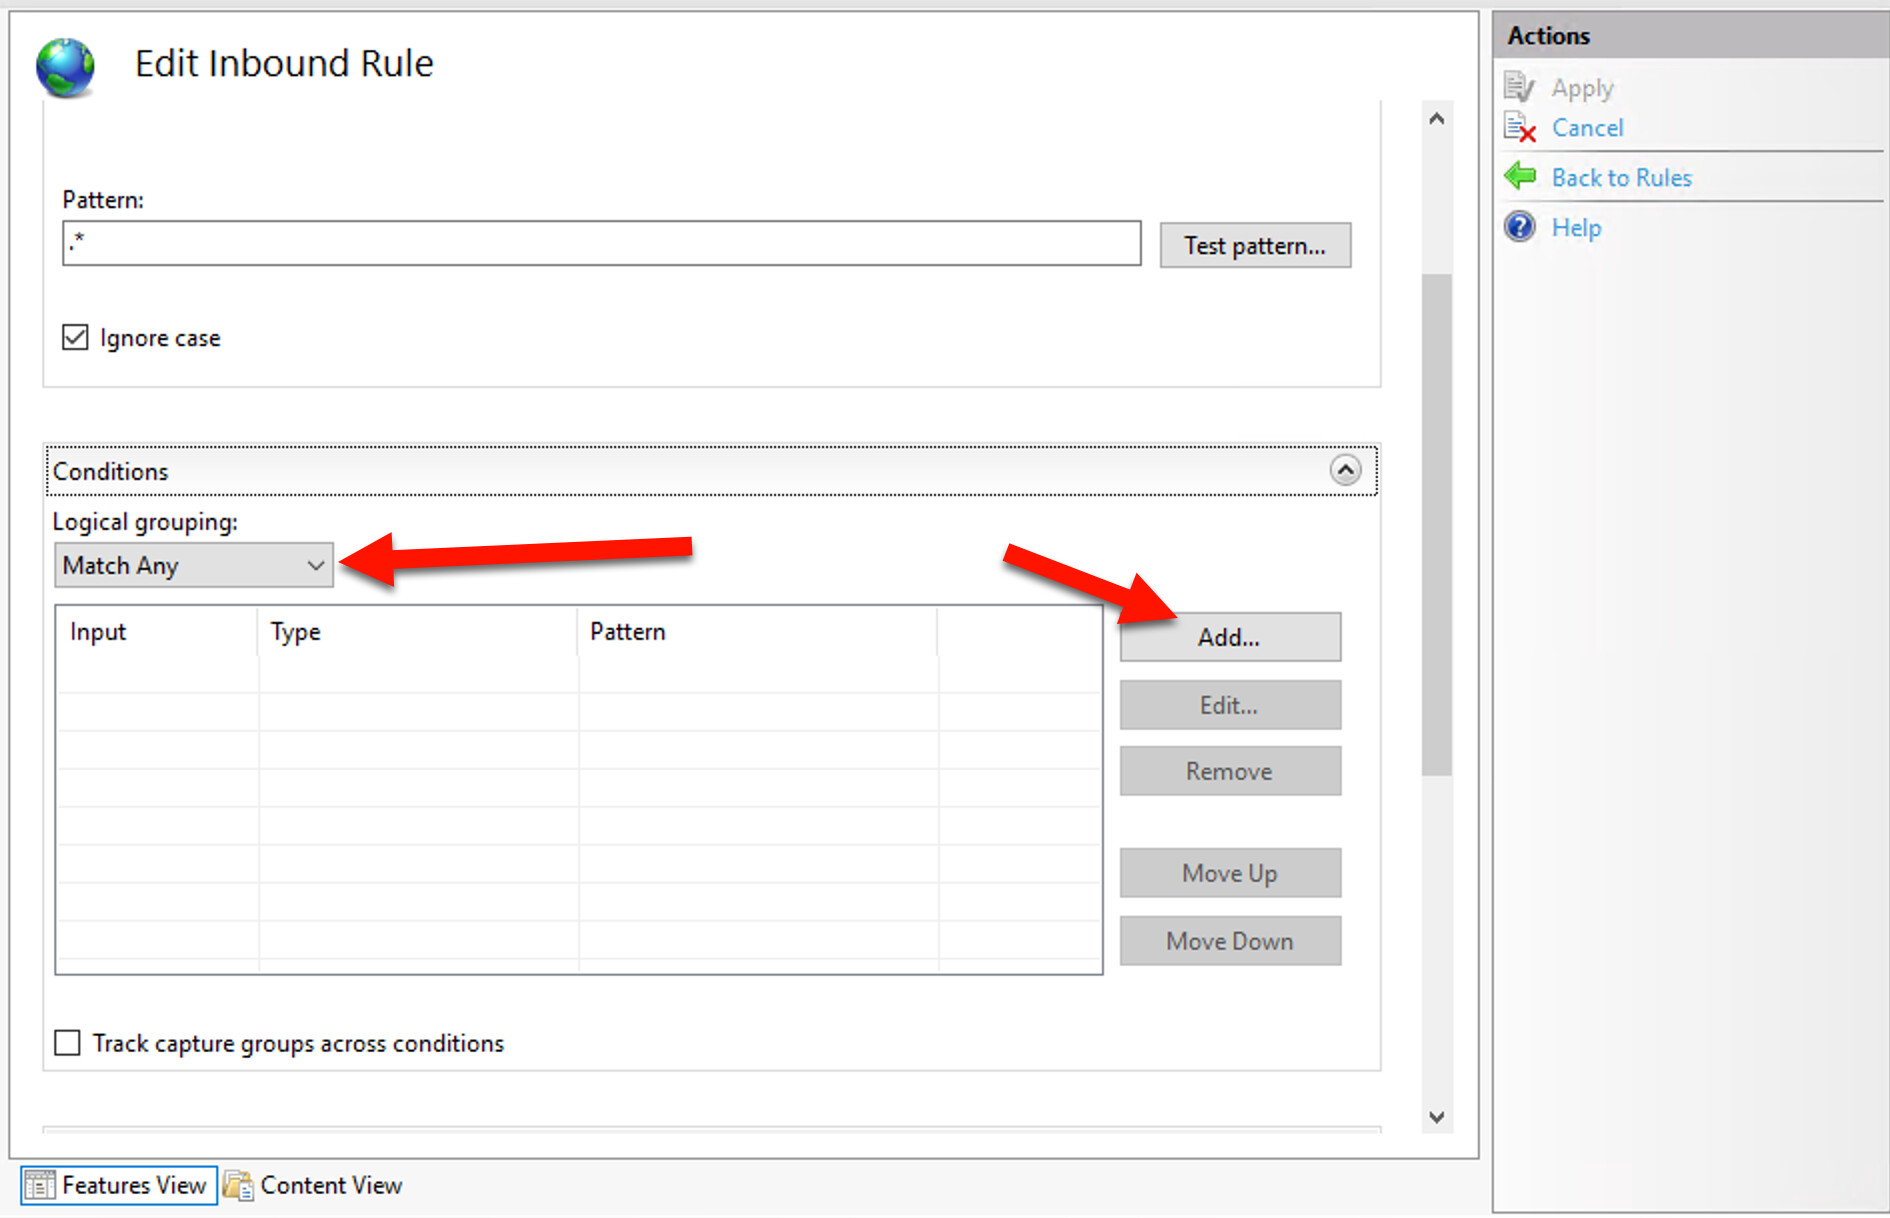
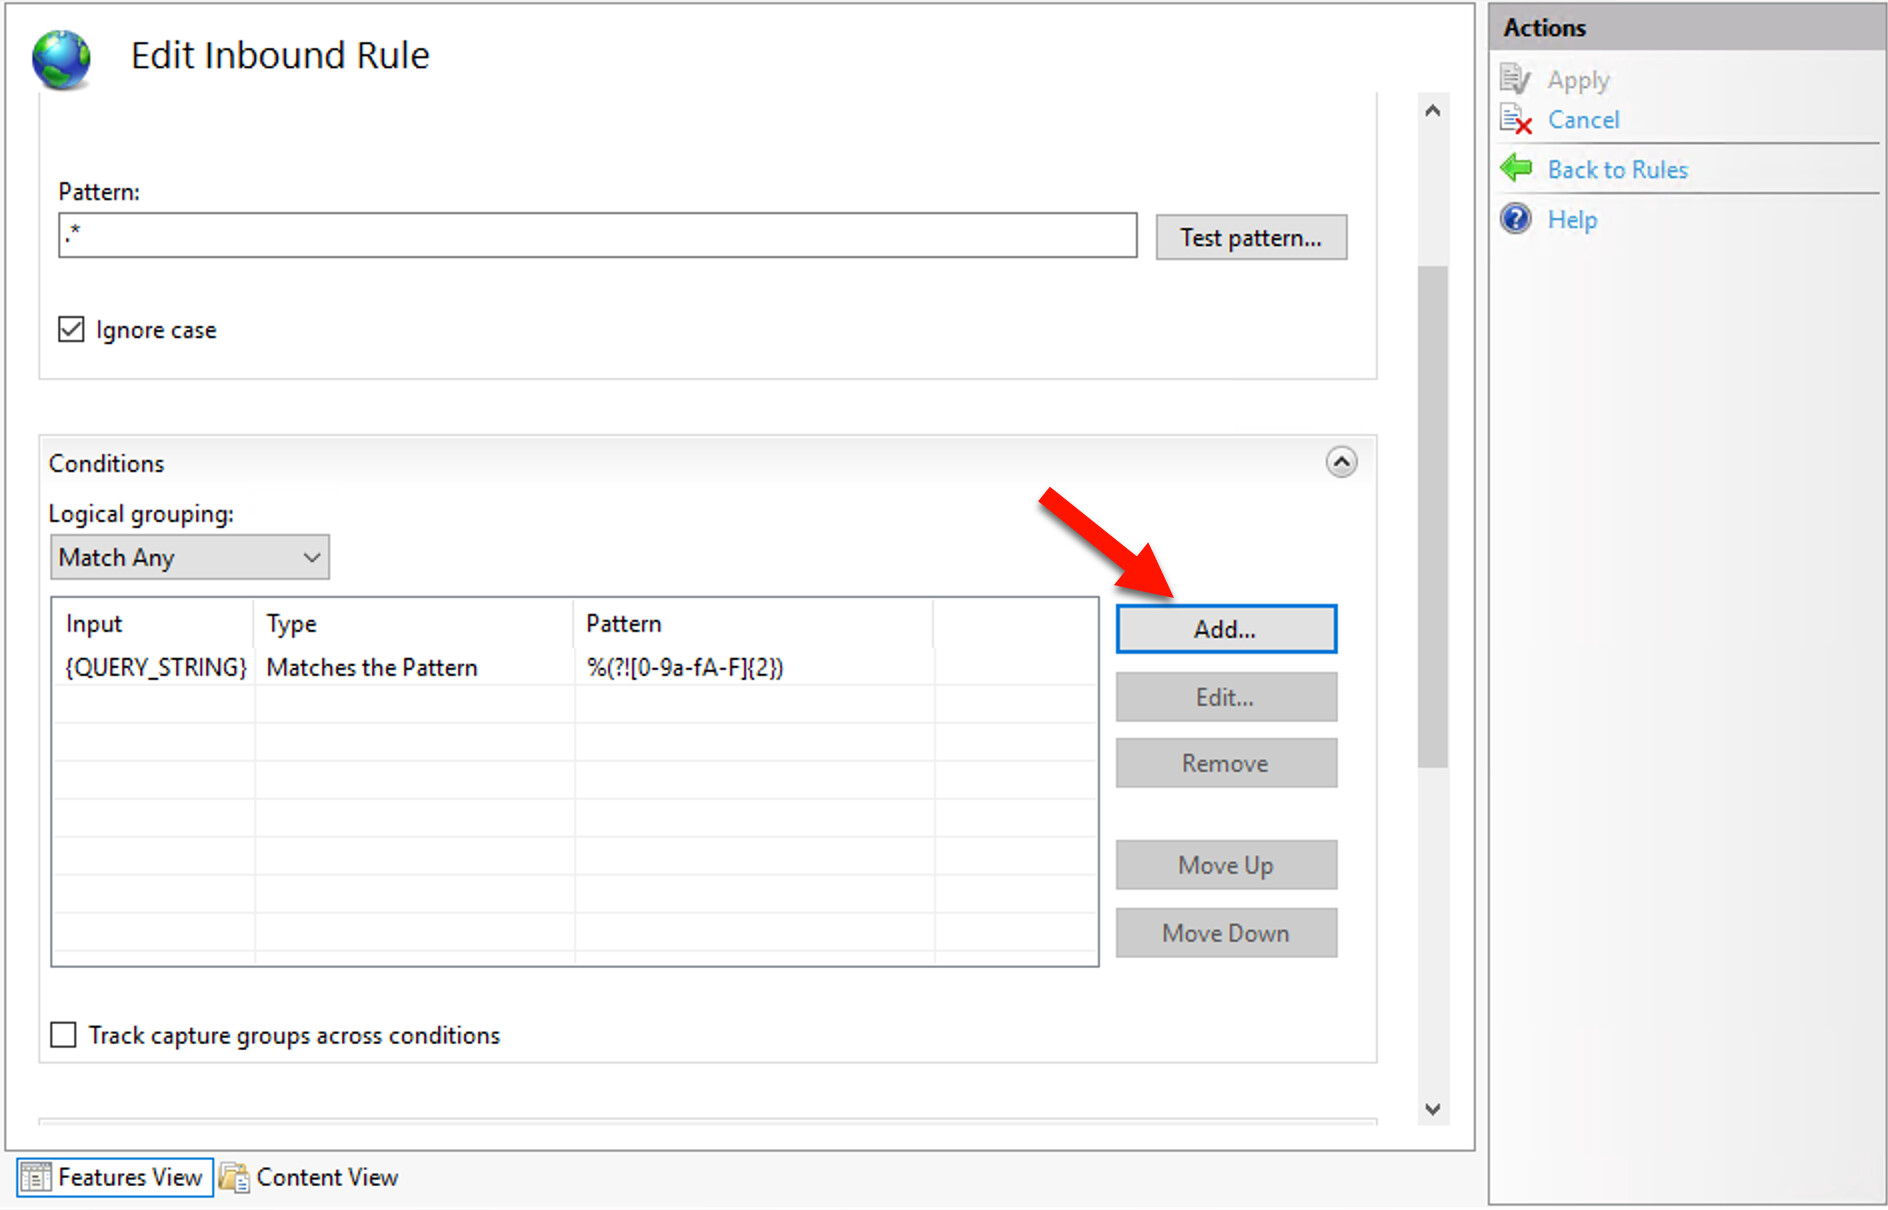
Expand the Conditions group and change the Logical grouping selection to Match Any. Click the Add button.
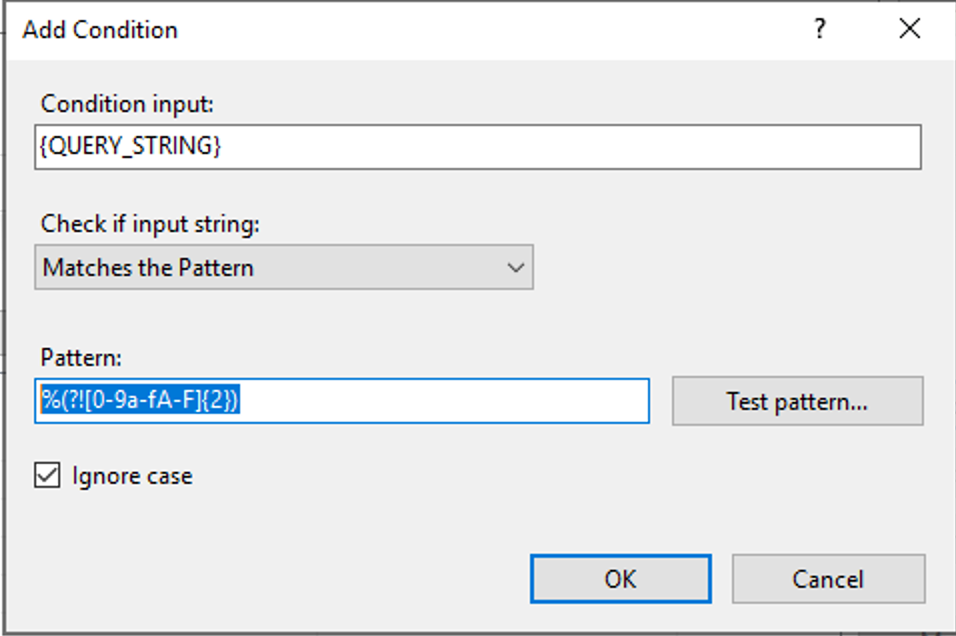
For Condition Input, leave it at {QUERY_STRING}. Set the Pattern to %(?![0-9a-fA-F]{2}). Click OK.
You’ll see the new condition in the list. Click Add again.
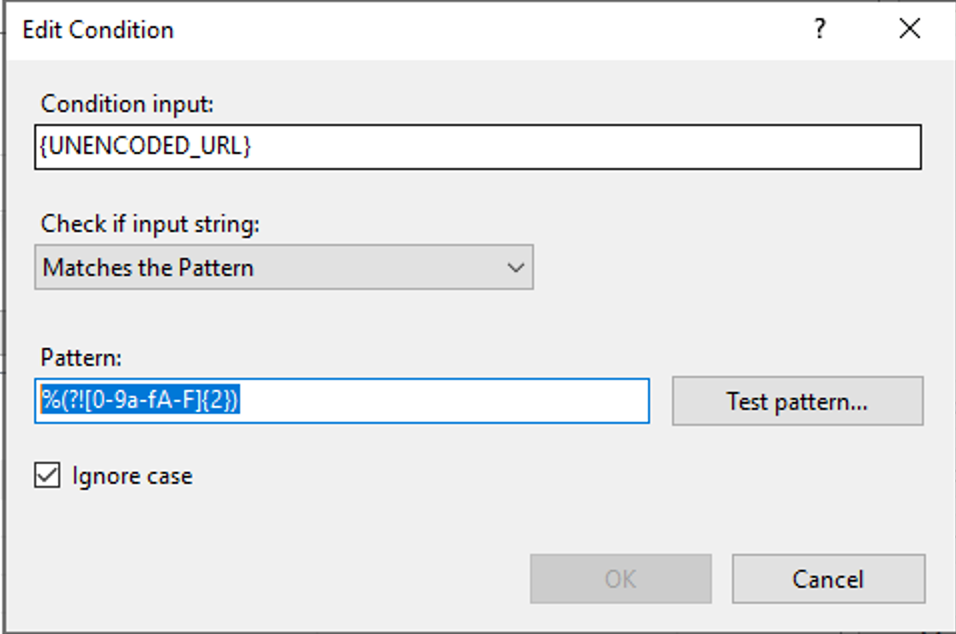
This time, change Condition Input to {UNENCODED_URL}. For the Pattern, use the same as before: %(?![0-9a-fA-F]{2}). Click OK.
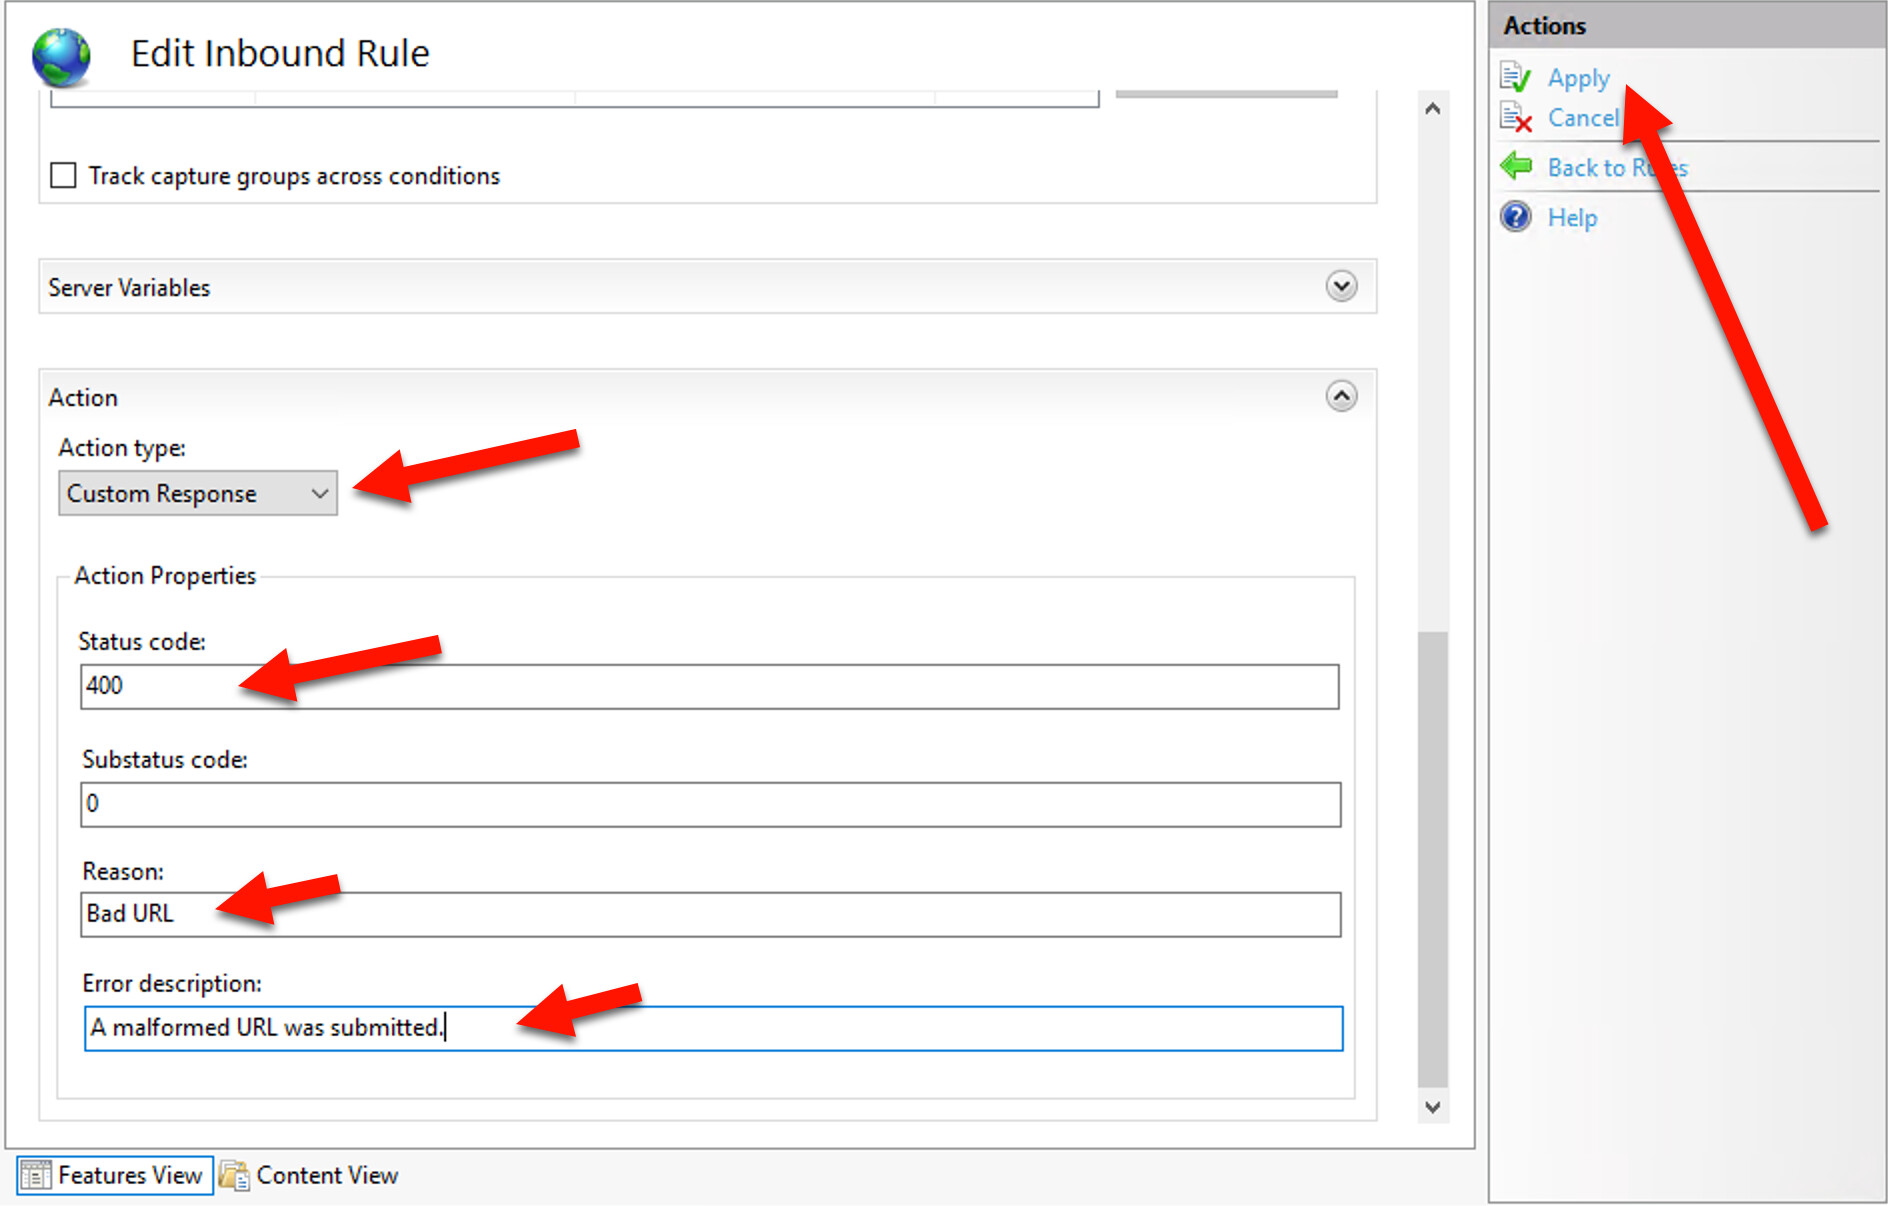
In the “Action” section, change the Action Type to Custom Response. You can use whatever error codes and messages you like; I chose 400, Bad URL, and A malformed URL was submitted. Fill in all these entries and click Apply in the top right. After that, click Back to Rules, also in the top right.
You’ll see your new “Xojo Fix” rule in the list. However, the Reverse Proxy rule still takes priority over it. Select your new “Xojo Fix” rule and click Move Up to move it to the top of the list, above the Reverse Proxy rule. Click Yes to confirm the change.
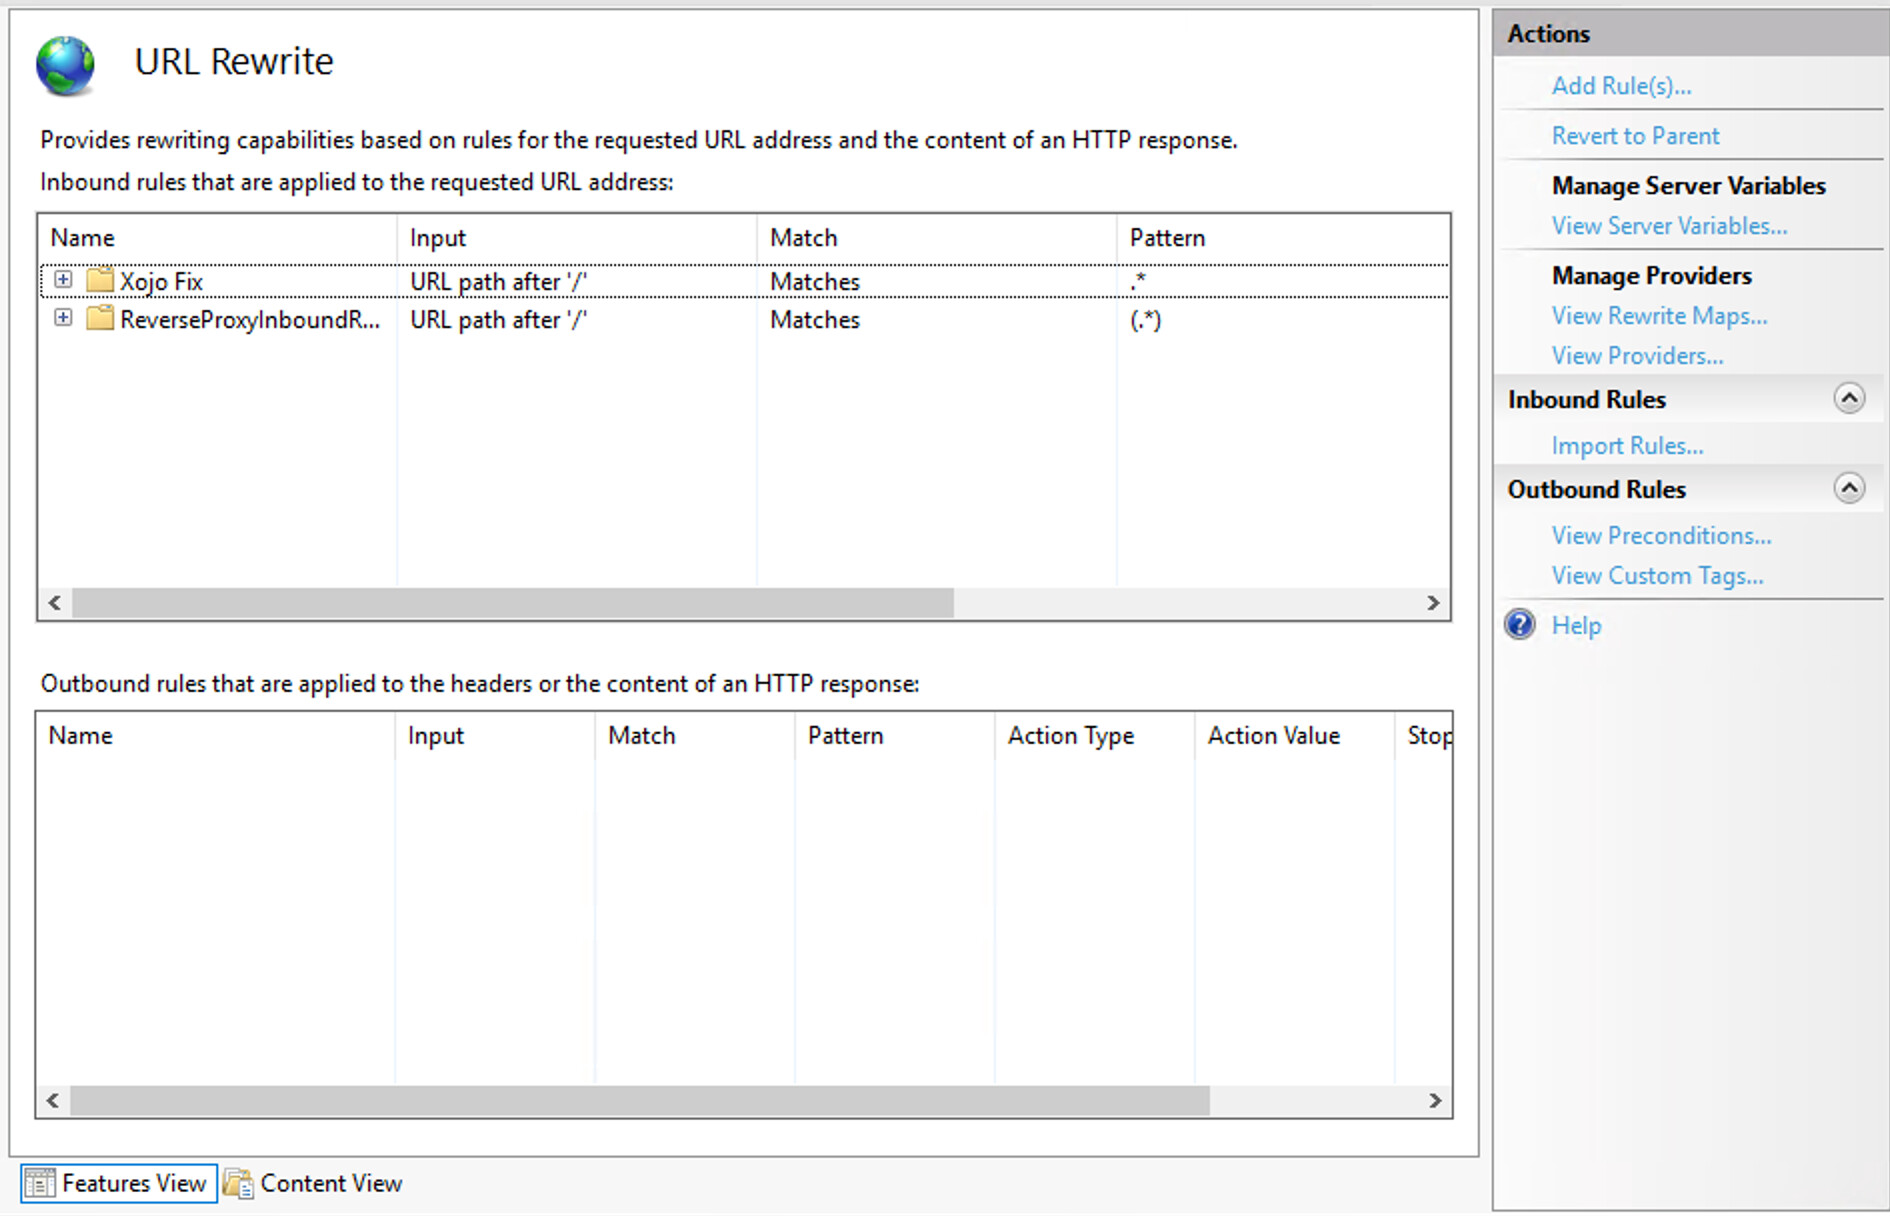
That should do it! If it looks like this, now users submitting a malformed URL will get a 400 error while properly formed query strings should still flow through.