Transparent picture not printing transparency

Windows 7 - Xojo 2015 v2.1
Both pictures are rhombuses, with the same Width and Height
–> the second picture erases a rectangle (the rectangle within which the rhombus is) above the first, when they should be printed edge to edge

On MacOS, printing is correct
I’ve tried to UseGDIplus, it’s the same

Dim g As Graphics
g = OpenPrinterDialog
If g <> Nil Then
g.DrawPicture(SGH05,20,20,100,100,0,0,SGH05.Width, SGH05.Height)
g.DrawPicture(SGH08,80,80,100,100,0,0,SGH08.Width, SGH08.Height)
End If

What can I do ?
Thanks
Marc

Add a mask to the picture that doesn’t print transparently. It clearly doesn’t have a transparent area.

If the unwanted area is white, select the image in the project using the IDE ,set the transparency to ‘white’ and that will probably be enough.

The unwanted area is transparent, not white, and I’ve already tried to check "transparency to ‘white’ ", without effect
Here the pictures :
http://www.marinelabel.com/Xopic/SGH08.png
http://www.marinelabel.com/Xopic/SGH05.png
On Mac it’s ok, only on Windows that doesnt works

[quote=200035:@Marc Couraud]The unwanted area is transparent, not white, and I’ve already tried to check "transparency to ‘white’ ", without effect
Here the pictures :
http://www.marinelabel.com/Xopic/SGH08.png
http://www.marinelabel.com/Xopic/SGH05.png
On Mac it’s ok, only on Windows that doesnt works[/quote]

Don’t use GDIPlus, it does not support transparency.

I can only suggest to flatten the transparency, e.g. by drawing picture in a new picture to fill surrounding area in white.

Both pictures downloaded do show as transparent on my mac, as you say.

On Windows:
The first drawn may seem to be drawing transparent, but will in fact be drawing in white on white
Then the second also does that and erases part of the first.

Given that both appear to be a design in a rhombus of the same size, I go back to my first suggestion:

Create a black and white image with the (filled) rhombus shape in black on a white background, and apply that as a mask to both images .

(If you have other shapes, you will need other masks.)

Christian’s idea : the background of the printed pictures is all black…
Jeff’s idea : with the mask, no change, the second picture erases a part of the first
Thanks to you
Any other idea ?

Windows doesn’t print transparency. Use Christian’s suggestion and flatten to a non-transparent (white background) image. Then print that.

Hi Tim, I changed the pictures : they have a white background in place of transparent

  • if transparent is set to white, the background of the printed pictures is all black, and the second picture erases a part of the first
  • if not, the background is printed white, and the second picture erases a part of the first

???

Only the final image (the one you send to the printer) should be non-transparent.

Hmmm, in this code, which image should be “transparent” ?

g = OpenPrinterDialog
If g <> Nil Then
g.DrawPicture(SGH05,20,20,100,100,0,0,SGH05.Width, SGH05.Height)
g.DrawPicture(SGH08,80,80,100,100,0,0,SGH08.Width, SGH08.Height)
End If

thanks

The correct result (on Mac) : http://www.marinelabel.com/Xopic/Result1.png
The result on Windows with the same pictures : http://www.marinelabel.com/Xopic/Result2.png
The result on Windows with the second picture “transparent = 1” : http://www.marinelabel.com/Xopic/Result3.png

NB for the 3, I used this code (“Only the final image (the one you send to the printer) should be non-transparent.” as Tim said) :

p1 = new Picture(SGH05.Width, SGH05.Height, 32)
p1.Graphics.DrawPicture(SGH05,0,0)
p2 = new Picture(SGH08.Width, SGH08.Height, 32)
p2.Graphics.DrawPicture(SGH08,0,0)
g.DrawPicture(p1,20,20,100,100,0,0,SGH05.Width, SGH05.Height)
p2.Transparent = 1
g.DrawPicture(p2,80,80,100,100,0,0,SGH08.Width, SGH08.Height)

What can I do ?

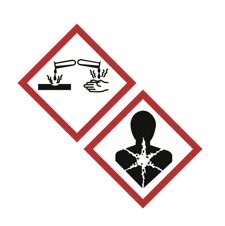
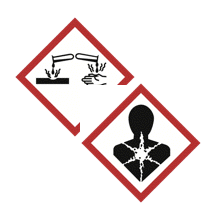
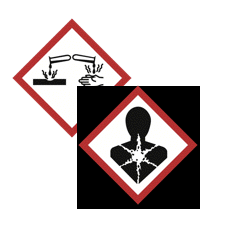
[quote=200028:@Marc Couraud]Windows 7 - Xojo 2015 v2.1
Both pictures are rhombuses, with the same Width and Height
–> the second picture erases a rectangle (the rectangle within which the rhombus is) above the first, when they should be printed edge to edge

On MacOS, printing is correct
I’ve tried to UseGDIplus, it’s the same

Dim g As Graphics
g = OpenPrinterDialog
If g <> Nil Then
g.DrawPicture(SGH05,20,20,100,100,0,0,SGH05.Width, SGH05.Height)
g.DrawPicture(SGH08,80,80,100,100,0,0,SGH08.Width, SGH08.Height)
End If
[/quote]

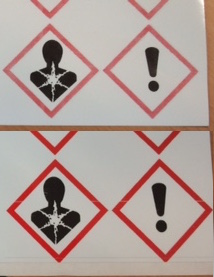
OK. I just tried your code with the two pictures you posted with an HP Envy 100 printer, as well as Windows XPS Printer, and Windows 10 Microsoft Print to PDF. As expected, SGH05 prints above and on the left of SGH08. No issue whatsoever on the three printers. Both pictures print perfectly.

It is possible the issue you encounter is due to the particular printer you are using.

You could work around the issue by creating a larger picture that contains both, and print that picture.

Dim g As Graphics g = OpenPrinterDialog If g <> Nil Then dim GDI as boolean = App.UseGDIPlus App.UseGDIPlus = True // Necessary to create an alpha channel picture dim printerpic as new Picture(350,350) Printerpic.graphics.DrawPicture(SGH05,20,20,100,100,0,0,SGH05.Width, SGH05.Height) Printerpic.graphics.DrawPicture(SGH08,80,80,100,100,0,0,SGH08.Width, SGH08.Height) g.DrawPicture(printerpic,0,0) App.UseGDIPlus = GDI // Restore the original state of UseGDIPlus End If

I think you’re missing something. The idea is to combine the images into a third image, which is not transparent, as Michel suggests as well. The original images remain transparent. You combine them into a third image which is not transparent and has a white background. You print that image.

Printing usually entails “layering” things from bottom up. You print a background (such as the lines and boxes of a form), then you print some text on top of it, etc. Always assume that what you’re printing is erasing what is underneath it.

I used to have a product which printed pictures as the background of a check, like commercial ones, and then proceeded with text over it. On certain printers, although I was starting with the picture and printed over it, the text never showed. It happened on the very popular HP P1005/1006 series of laser printers.

The only way to get around that was to do what I posted.

Note that to get best results, it is usually good to make the picture as large as full resolution would require, and then scale it down for printing. In fact, like you were doing in the first place. My example above is a quick piece of code which prints at 72 dpi, probably not enough.

I’ve made a test with DynaPdf on Windows, with the same code, the created pdf prints correctly with adobe reader !!
But I must print directly, so I will combine the images into a third image as you advise me… but it is not light, because in fact I have more than two images
Many thanks
Marc

[quote=200318:@Marc Couraud]I’ve made a test with DynaPdf on Windows, with the same code, the created pdf prints correctly with adobe reader !!
But I must print directly, so I will combine the images into a third image as you advise me… but it is not light, because in fact I have more than two images[/quote]

It should not be that complicated. Just make g a reference to printerpic.graphics. Then everything you have done to draw to g stays the same. In fact the code you have so far will be redirected to the picture without any modification. See how I modified my code to use g, and what was formerly g is now p.

Dim p As Graphics p = OpenPrinterDialog If p <> Nil Then dim GDI as boolean = App.UseGDIPlus App.UseGDIPlus = True // Necessary to create an alpha channel picture dim printerpic as new Picture(p.width,p.height) dim g as graphics = p g.DrawPicture(SGH05,20,20,100,100,0,0,SGH05.Width, SGH05.Height) g.DrawPicture(SGH08,80,80,100,100,0,0,SGH08.Width, SGH08.Height) p.DrawPicture(printerpic,0,0) App.UseGDIPlus = GDI // Restore the original state of UseGDIPlus End If

oops. Sorry, I did not quite do what I was describing. Line 7 should read :

dim g as graphics = printerpic.graphics

Tested, it works just fine.

Yes, for me too, it works just fine.
Thanks Michel !
Marc

The rest of the story…
I created a new picture containing all the different pictures (printerpic = New Picture(width, height , 32))
g = OpenPrinterDialog
When I print printerpic by g.DrawPicture, the color of the red is very light :
http://www.marinelabel.com/Xopic/DifferentColor.JPG

  • result on the top
  • on the bottom, the colors are correct, when I print directly each picture
    Can somebody help me to correct this ?