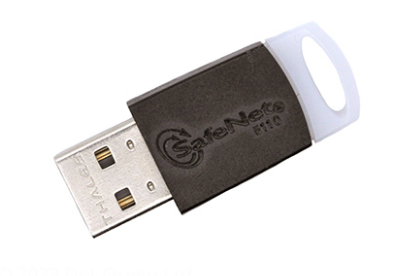
How to automate SignTool with a SafeNet Token from Sectigo
Modern code-signing certificates require a USB hardware dongle. Here’s how to automate the process so you can use signTool with InnoSetup to sign Windows EXEs.
In addition, these instructions support doing the code-signing on a Windows VM hosted on macOS.
Install a recent Windows SDK
Link
Note: you only need the “Windows SDK Signing Tools for Desktop App” component which is about 15MB
Download and Install the SafeNet Authentication Client software
Link
Note: version 10.9 worked, but an earlier 10.8 version was failing for some reason. The “typical” install option is good.
Launch “SafeNet Authentication Client Tools”
“SafeNet Authentication Client” may also show up in the Start menu, but you need the “…Tools” version
Plug the hardware token into a USB port
Note: if you are using a Virtual Machine, the USB hardware may show up as two separate devices, and if you connect the wrong one, it only partially works (the app freezes up for 3 minutes and shows “Orphan Objects” instead of your actual certificates)
I connected the one named Aladdin Knowledge Token JC to my Windows VM USB and it worked.
I’m using VMWare Fusion 13.6.1 running a Windows 10 VM build 19045 hosted under macOS 14.7.1 on a 2019 Intel MacBook Pro
Optional: Change the Token Password
Note: be careful here - my token has 3 password attempts before bricking, so make sure you are changing the right password (there is a user password and an admin password).
Test SignTool
At this point, you should be able to use signtool to sign an EXE, but it will require you to enter your token password every time.
Example signtool command:
"C:\Program Files (x86)\Windows Kits\10\bin\10.0.26100.0\x64\signtool.exe" sign /v /tr http://timestamp.sectigo.com/ /td sha256 /fd sha256 /d "A Description" /n "My Company" "C:\path\to\MyApp.exe"
Notes
/n "My Company" should be the same name as your Token name- the signtool path
...\bin\10.0.26100.0\ may be different based on the SDK version you installed
Automation
There are two options to make signtool easier to use.
-
Single Logon mode: requires you to enter the token password once, and it will keep working until you log out. This is probably the more secure option, but won’t work for completely unattended builds or batch processing. To use this mode: inside SafeNet Authentication Client, click ‘Client Settings’, ‘Advanced’, and then enable the Single Logon checkboxes.
-
Full Automation - in this mode, you export a certificate file from the hardware token, and then include your token password in the batch file. Less secure, but the only way to do full automation of your builds.
Full Automation Steps
Reference: Link
In SafeNet Authentication Client
Export your public certificate
- Click ‘Advanced’ (gear icon)
- navigate to Tokens/Token Name/User certificates/Company name
- right click and choose “Export Certificate”
This will export your Public certificate. Save it to a convenient location
Find the Container Name
- Look for your Private Key
- find the
Container Name. Mine looked like this:
Sectigo_202411xxxxxxxx
- note the
Cryptographic Provider - it should be
eToken Base Cryptographic Provider
Create a signtool command
The signtool command will use the Public Certificate and Token Password with a special /csp option
Sample command line:
IMPORTANT Notes:
- the [{{ and }}] characters below are literals and must be included surrounding your actual password
- be careful!
if you get the password wrong 3 times, it’s easy to brick your dongle.
- the string
/csp "eToken Base Cryptographic Provider" is a literal - use it exactly as shown (it needs to match the Cryptographic Provider field in your Private Certificate)
"C:\Program Files (x86)\Windows Kits\10\bin\10.0.26100.0\x64\signtool.exe" sign /v /tr http://timestamp.sectigo.com/ /td sha256 /fd sha256 /d "A descriptive comment" /f "C:\path\to\my\PublicCertificate.cer" /csp "eToken Base Cryptographic Provider" /k "[{{MyTokenPassword}}]=MyContainerName" "C:\path\to\myApp.exe"

