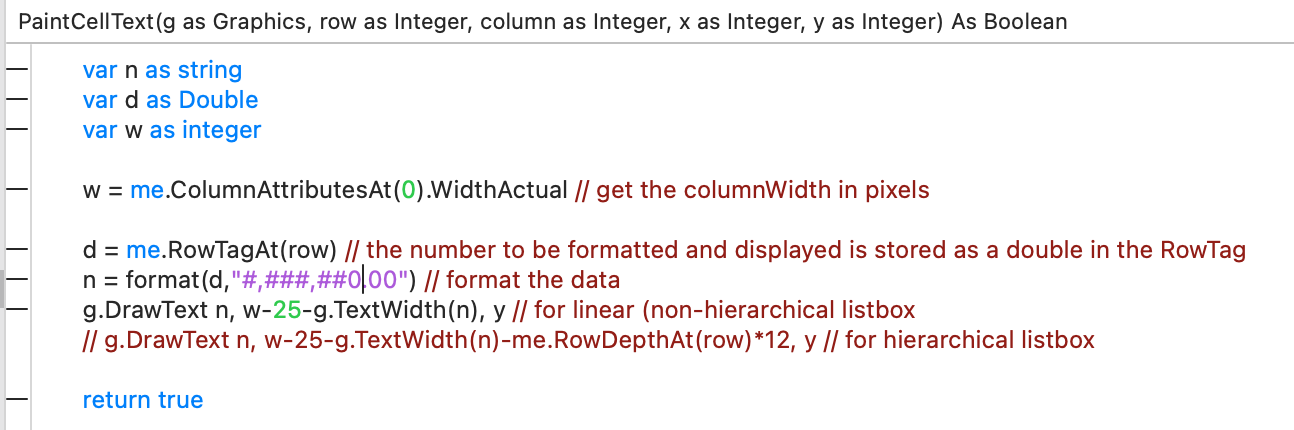
store each number as a double in the cellTag (the example below has 1 column and uses RowTag)…
in the listbox.PaintCellText event use something similar to the sample below to draw whatever you want in the cell, exactly where you want. You can have the text drawn and aligned, in colour, highlighted, add little icons if you wish, etc. It even works for hierarchical listboxes, noting that the x-coordinate is shifted right for each level.
Note you must return true from the listbox.PaintCellText handler for it to take effect.
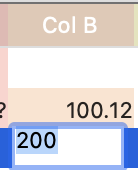
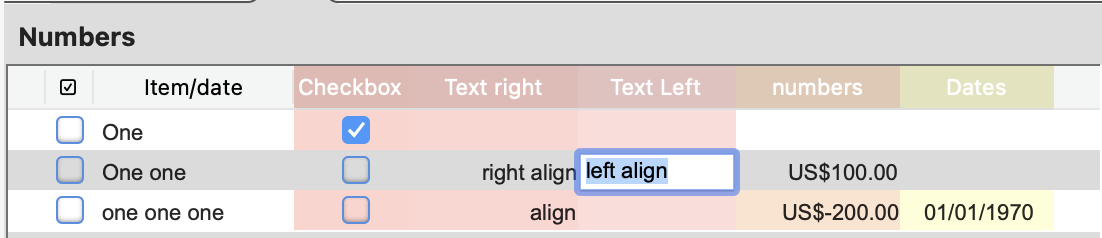
Thanks Nicholas. The problem is not with the paint event - I have similar code in there already, but as I tried to illustrate with the image it is EditCell which is the problem - this is where the activeTextControl should work with its formatting - but it always seems left and top aligned.
I haven’t looked at this in a while, but I have a vague recollection of this not working unless I set the properties later using a Timer.CallLater. I don’t have the time or ability currently to check, but that’s what I’m thinking.
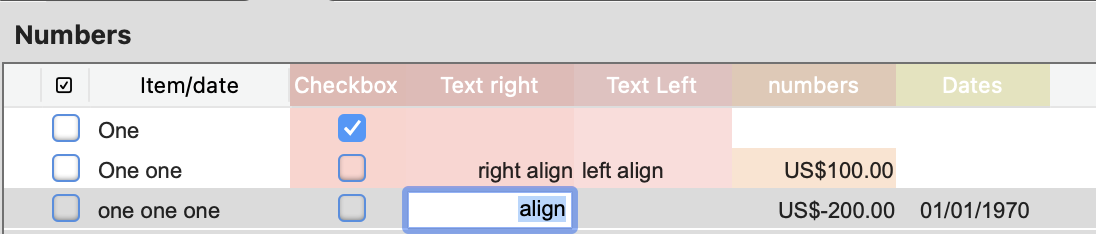
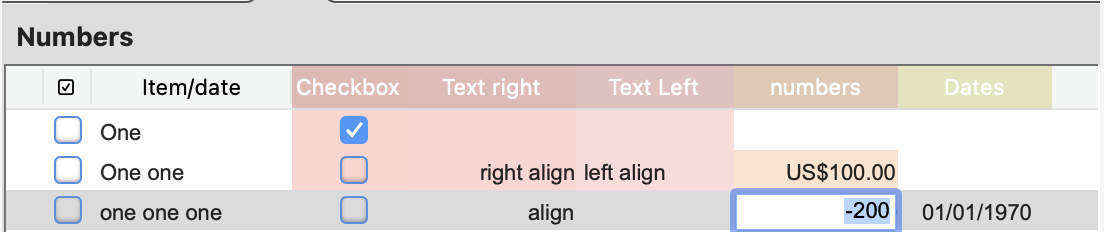
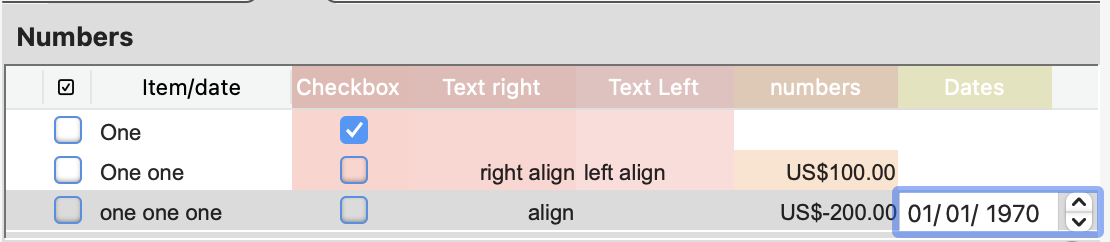
Having worked a little more on this I thought I’d document my workaround to get cell alignments (and other things) in the to replace the editCellAt function - essentially a grow your own editCell.
In the cellPressed event I embed a containerControl in the container underlying the listbox. The containerControl includes a textField (or datetimepicker or other items).
The position and size of the containerControl is determined by the columnNo, columnwidths and HeaderHeight, rowHeight of the listbox (using % or * variables in the widths would complicate this a bit).
Alignment, fonts, font sizes are also passed to the containerControl depending on the alignment required.
On loss of focus of the textField, its value raises a changed event to pass the value back to the original listbox cell.
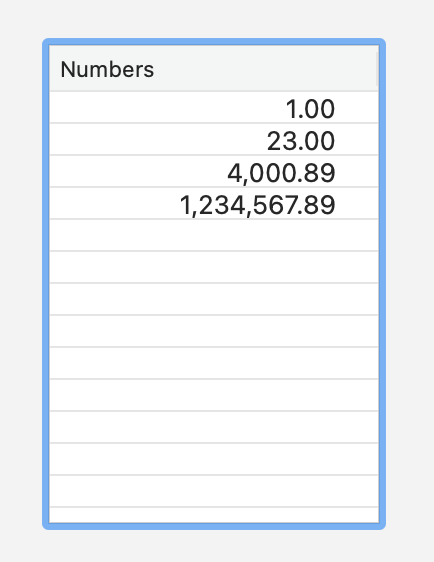
The images show the result which is pretty close to the desired result.