Cheque printing report

Greetings,

Can anyone clear the confusion on the printing part using reports

I have a brother ML-L2365DW printer and I try to print some cheques which are 80 mm x 175 mm

I did set the size for the cheque but apparently no matter what I do it is either printing very small or on the wrong position

In the printer I insert it with the small side meaning 88 mm side and I need to print on the long side,

Is there a way to shift the text or what should I setup in the report or on the page printing side ?

I tried all the possible ways and I don’t seem to make it work.

Thanks

All printing has margins. You need to take those offsets into account, by subtracting them from your measurements at runtime.

Well I did setup the page setup as custom format and I put the actual cheque and margins , header and footer as 0

And , again, I’m using the Report, but it is super weird as I have same field, same font same size and they act differently I that report no idea why

All text sizes are set as 5 mm and text fields are all same , and look what I get

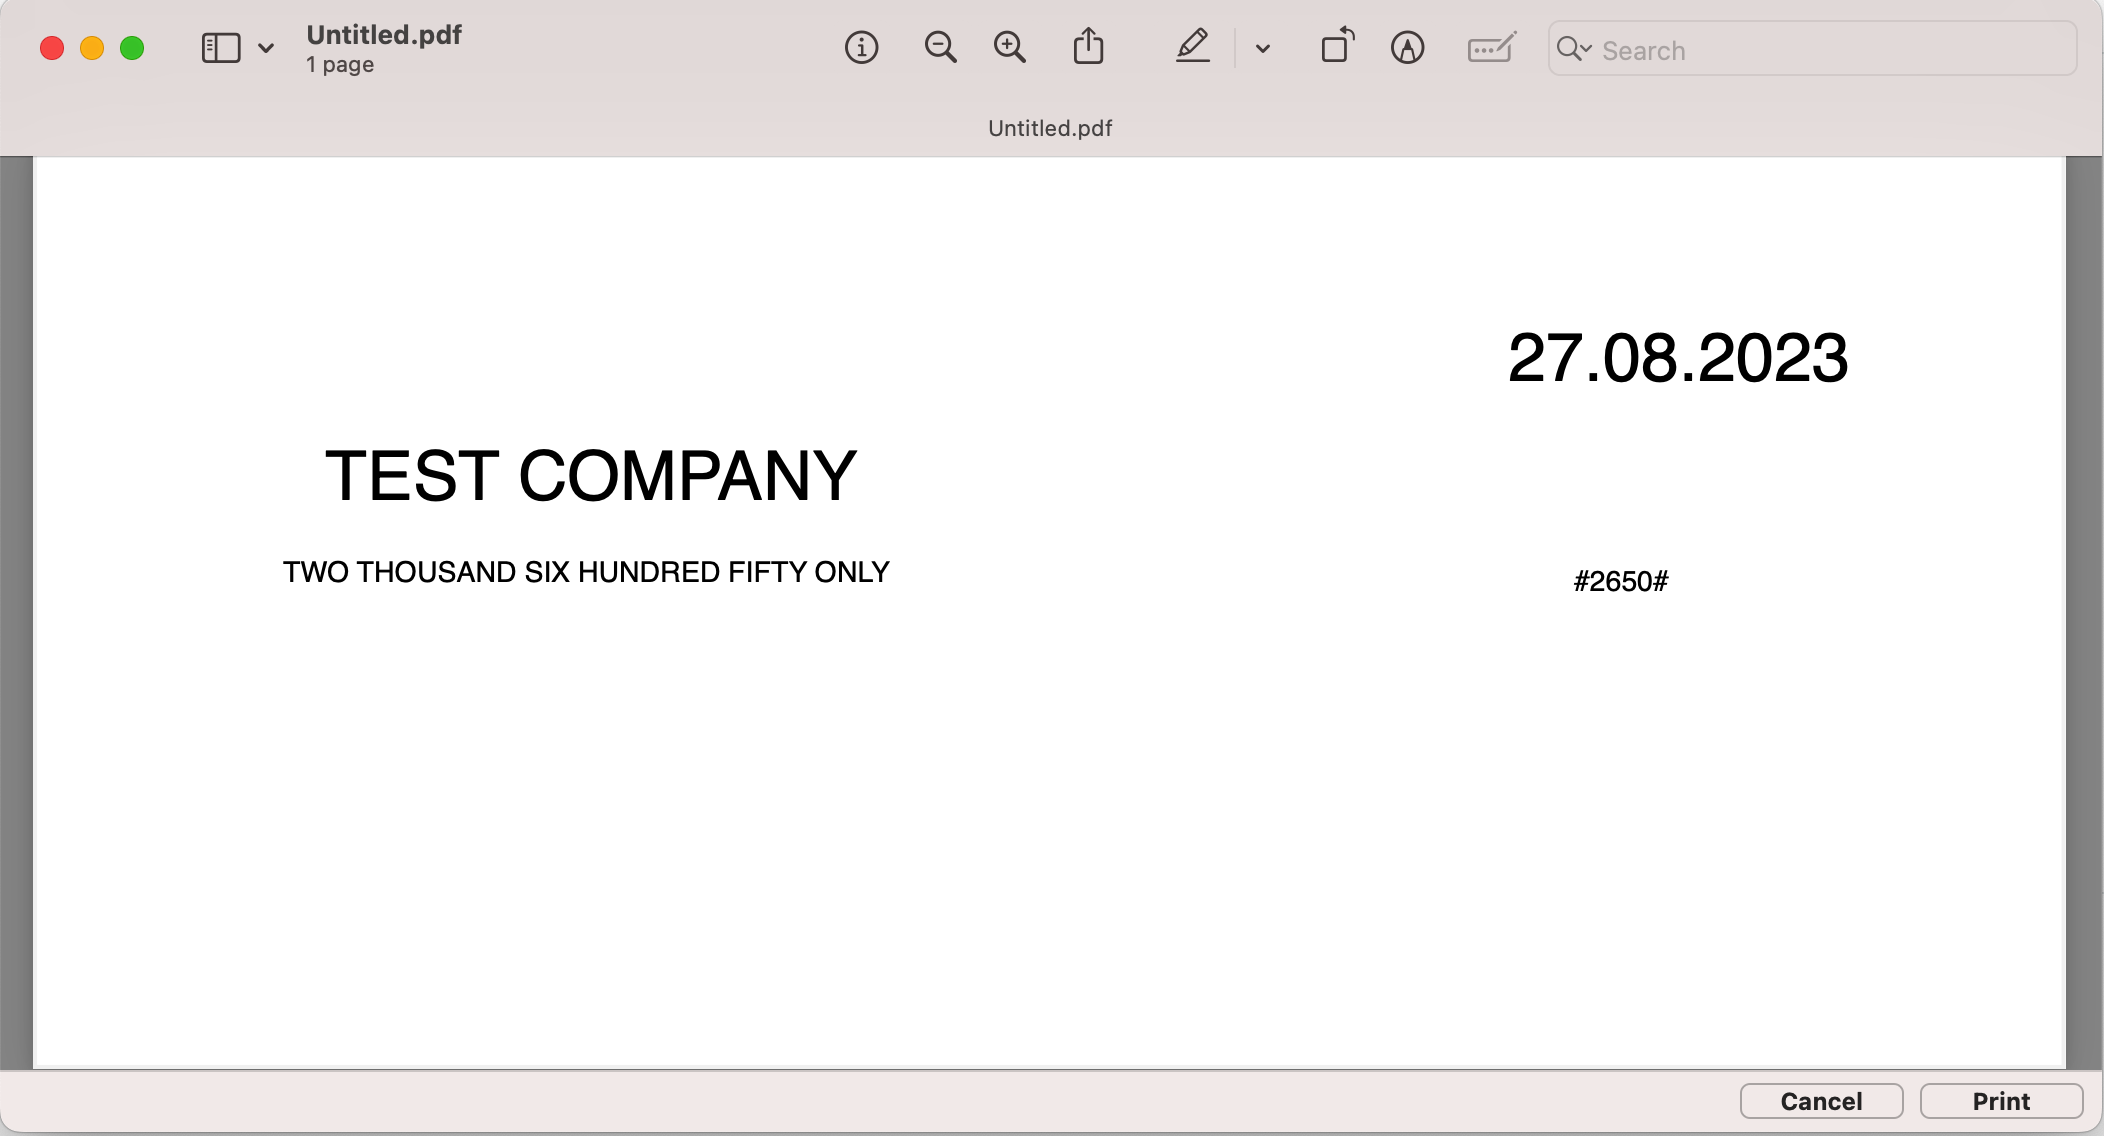
And that is in the preview so it looks perfect, but when printing nothing gets printed .

This is the code

Var rpt As New Report1

Var ps As New PrinterSetup

If ps.ShowPageSetupDialog Then
  Var g As Graphics
  
  g = ps.ShowPrinterDialog
  
  Var rs As RowSet
  
  
  rs = DB.SelectSQL("SELECT * FROM cheque")
  
  
  If g <> Nil Then
    If rpt.Run(rs,ps) Then
      If rpt.Document <> Nil Then
        rpt.Document.Print(g)
      End If
    End If
    
  End If
End If

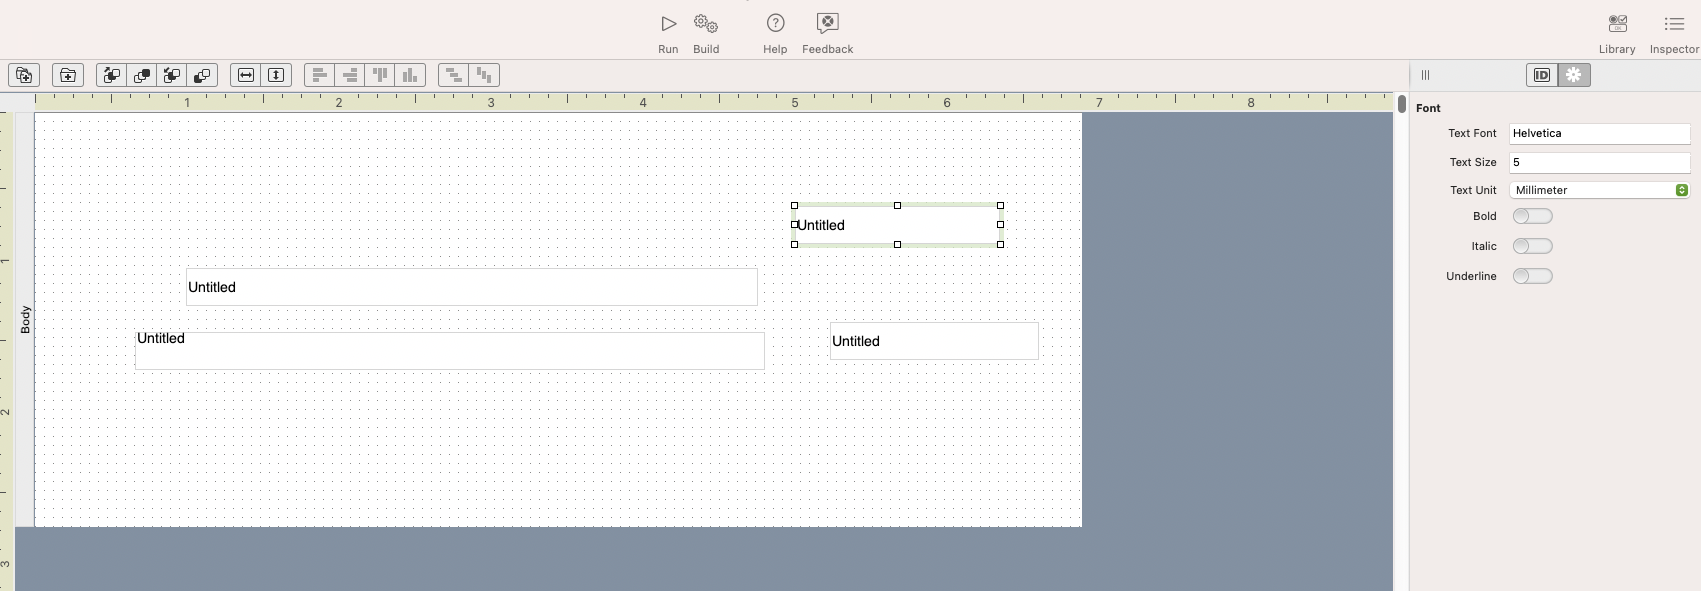
and this is the report , so what I am doing wrong ? as I don’t get it

While I understand that you asked for 0 for the margins, you should check again afterwards. The minimums are set by the print driver.

My suggestion is to do away with the report and just use a print context

1 Like

Yeap, it went smooth like butter,

It is little bit hard to approximate the location but after few wasted papers it worked.

Any idea how to avoid putting this each time ?

Is there a way to save it and never ask again ?

Thanks

ho boy , that PageSetup dialog is quite annoying , apparently for my other receipt project I need to do a weird step.

So I Select this , then I print in pdf then I print again, and select the proper printer and print and it works

No idea what to do,

Can this Page Setup be set once, saved as data and then called every time is needed ? so we can just show the printer and done ? or even the printer can we save it once and skip showing it and print it each time on same printer ?

Yes, you can save the PrinterSetup.Settings string. Restore it later and call PrinterSetup.OpenPrinter to bypass the setup dialogs.

Make sure you hex or base64 encode the string when you save it or it will come back corrupt

I’ll do that, thanks.

One little issue that I might have.

In my case I have the amount in letters which for big amounts could be quite big and in the cheque side we do have 2 rows for that .

Is there a way to be able to split the g.DrawText( so that it adapts on the needed space ?

Ideally would be to draw the text to fill the row and then shift it down on the second row

Thanks

Isn’t it .DrawText ?

yes, this is what I mentioned earlier, however, on the 3rd parameter in my case

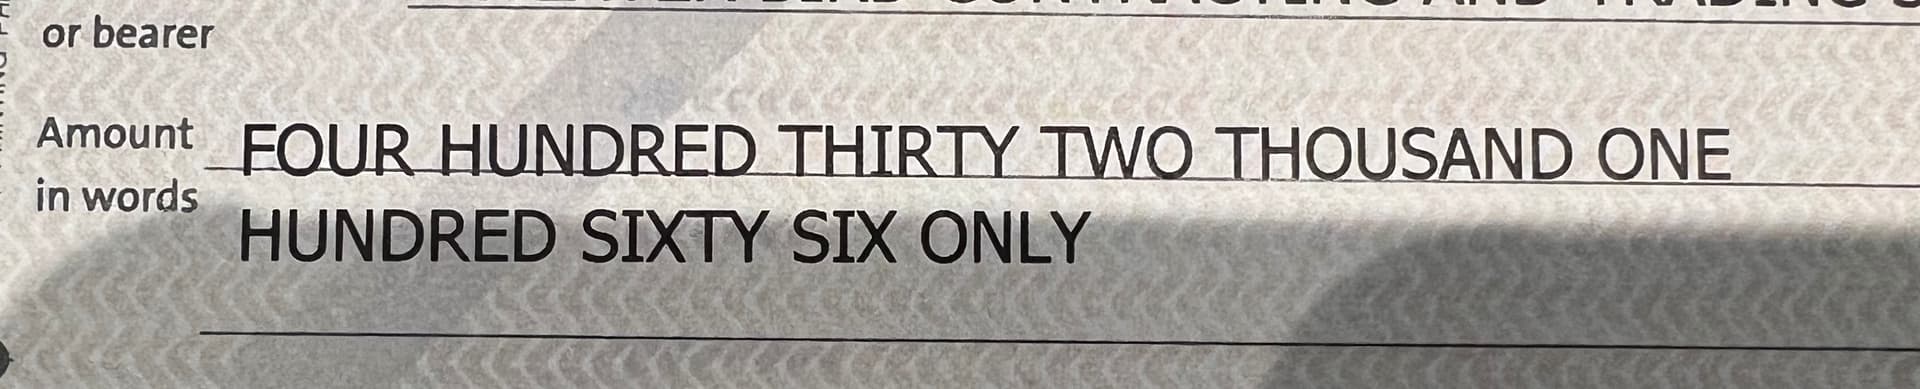
g.DrawText(ammountInwords, 20, 90, 250) on 250 it will split into a new line but the text under should go more down than it is now, so the question is , can we set the space between lines to be bigger ?

here is a photo to get the idea of what I mean, I need it to be on the line under .

Use g.TextHeight to determine how many lines will be drawn and adjust your other drawing to match.

Hi Tim, I’m not sure I get it as the g.DrawText does that automatically, based on the 4th parameter which is maxWidth based on the docs and the only parameter I have is the condense which is false.

So in my case using g.TextHeight how would that help ? as how I said earlier the method does the splitting and I cannot control it .

I guess it would be nice to have like in Word , I guess it is called LineSpacing and it will setup the space that you have between lines.

If you need to control the split of a line, you can do something like this:

Function SplitLinesToFit(g as Graphics, txt as String, width as double) as String()
    Dim arr() as String = split(txt)
    Dim lines() as string

    While ubound(arr) > -1
        Dim words() as string

        // add words until we go over the desired width
        Dim curWidth as double
        While curWidth <= width and ubound(words) < ubound(arr)
            Words.Add arr(ubound(words)+1)
            CurWidth = g.stringWidth(join(words, " "))
        Wend

        // Remove the last word that made us go over
        If ubound(words) < ubound(arr) then
            Words.RemoveAt(ubound(words))
        End if

        // remove the words we used from arr 
        For I as integer = 0 to ubound(words)
            Arr.removeAt(0)
        Next I

        // make a line for the ones we did
        Lines.Add join(words, " ")
    Wend

    Return lines
End Function

It simulates the splitting and tells you how many pixels it will take to draw the text.